Monthly Archives: May 2013

Disaster Assistance Team

Standard

Well, yesterday totally required a Disaster Assistance Team…part of the days disaster was loosing my so terrific picture of friends Sandy and Judy standing next to a truck advertising Disaster Assistance Team. Sigh…

Left early morning for a trip up to Montgomery Texas to meet a quilting buddy and her hubby, Sandy and Gerald. Going to visit and bring home a wonderful batting rack that Sandy was kindly donating my way. Almost made it when my baby, my cream white SUV decided it wouldn’t go further. Beautiful weather, sunny with a nice breeze, and there we sat! Onstar was great, that is after nearly an hour of convincing the obviously new employee that I was indeed 12 miles from I45 and did not need to be towed to Austin, 3 hours away. What can I say, she was obviously very new and trying hard. Eventually the tow truck came and off went my baby. It now sits at Buckelew Chevy in Conroe Tx. The good thing about that was that the serviceman, CW, lives on my end of town and gave us a ride back to a stafford, Tx. Looking on the bright side! Had a great time visiting with Sandy and Gerald!

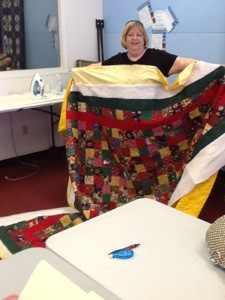
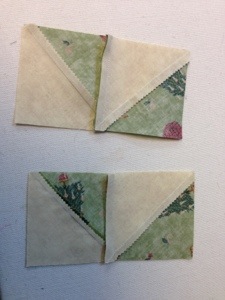
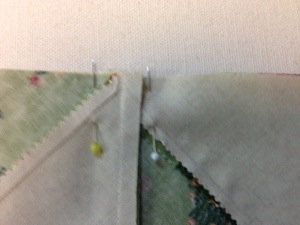
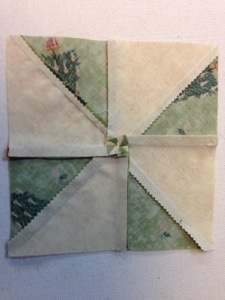
Ok, back to quilting. Here is the result of my pin wheel experiment from a few days ago. I will use it as a table topper when I get it quilted. I do like it though. The method worked really well, although it needed to be heavily starched to avoid mis shapen blocks due to the bias’.

20130505-153609.jpg

20130505-153617.jpg

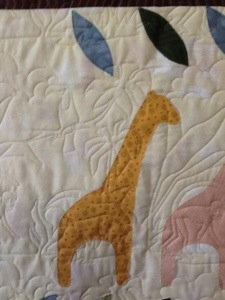
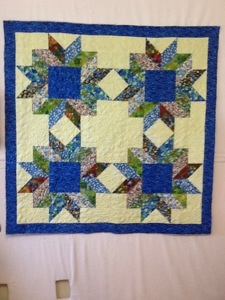
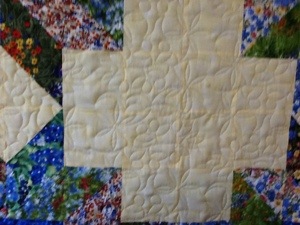
Also finished a wonderful Texas bluebonnet quilt which will wing its way to its new home next week. Can you see the wonderful quilted bluebonnet a? I love them

20130505-153809.jpg

20130505-153816.jpg

Off to see a lady about her tshirt quilt.

Bee happy, Karen

Advertisement

Quilts on their way home!

Standard

Delivered some quilts to their owners yesterday. Always a fun time.

20130503-053716.jpg This one is destined for a wedding in a couple of weeks. Great color choices by the bride. I love the addition of the brown narrow border.

20130503-053859.jpg

20130503-053910.jpg. These two quilts are headed to a new home…Jeannie’s use of color is fantastic!

20130503-054025.jpg

20130503-054032.jpg. This super cute baby quilt hasn’t reached its owner, Barbara, yet, but it is oh so cute! Quilted with Pom trees and monkeys joining the other jungle animals.

Great day, bee happy
Karen

Top ten reasons…

Standard

To own a recliner

10. Always comfy!
9. Room for me and my sewing!
8. Nice big armrest to support embroidery hoops.
7. Perfect place to stitch binding!
6. Place to kick up my feet.
5. Scissors and pin cushion fit on the extra wide armrest.
4. Mine has a drink holder.
3. Lots of room for chocolate.
2. Really easy on my “quilter” back.
1. Perfect place and size for my very large fur baby, Champ

20130502-191622.jpgk

Pinwheel perfect!

Standard

Well I’ve been playing with using up my stash and found some wonderful charm squares. Somewhere I saw a quilter making half square triangles from these. I wish I could remember where so I could give her credit. Here is how I remember it though.

20130501-053912.jpg

Take 2 charms and place them right sides together. Sew a scant 1/4 inch seam all around all four sides of the charms

20130501-054210.jpg

20130501-054233.jpg

20130501-054246.jpg

20130501-054259.jpg

20130501-054306.jpg

Carefully use your rotary cutter and ruler to cut these from corner to corner across the charms diagonally. Press each HST open, pressing the seams to the dark side. I advise using starch to stabilize the bias edges.

20130501-054733.jpg

20130501-054753.jpg

20130501-054804.jpg

20130501-054854.jpg
Once you have your pieces ironed, place them so that you can sew two HST together to form half of your pinwheel. Sew both halves. These will each nest easily. Now you will sew both halves together to form the final pinwheel. This is the tricky part. I pin them because of the thickness of the intersection. Note the pins in my pictures. I first pin one pin vertically thru the layers at where the center seams meet. You can peak between the layers to see that these seams match. THEN, I put a pin into the project on both sides of center, very close to the first pin. You can then remove the center pin and sew your seam. Only one center pin allows the fabric to “roll” and can offset your perfectly matched seam.

20130501-055748.jpg

20130501-055805.jpg

Once you have your perfectly matched seam you are ready to press your pinwheel. Make sure your seams are all pressed the same direction as they spin around your pinwheel. Then, by gently manipulating the center (you may have to loosen one or two stitches) you can make a beautiful tiny pinwheel in the center back of your block. Press this and you will have a perfect pinwheel!

20130501-060257.jpg

Congratulations. Sew easy!
Bee Happy, Karen