Category Archives: Piecing quilts

Piecing quilts

What makes it modern?

Standard

Well, even though I’m one of those “gray haired old quilters” I am intrigued by the modern quilters movement. I have been watching and reading about modern for a couple of years now. I love the bright, clean colors and the clean quilting lines. I’m intrigued by the movement but really have trouble seeing the wide divide between “traditional quilters” and this modern movement. Our “traditional” quilt guild is so receptive to all types of quilting, traditional piecing, appliqué, art and innovative, so many techniques, the more the merrier. Our members range from age 9 to age 90. Anyway, just rambling and wondering why the quilting world, always such a friendly place, seems to be morphing into a “them and us” group.

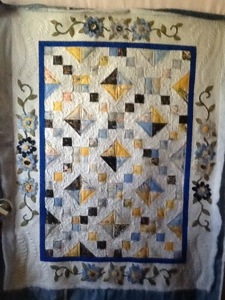
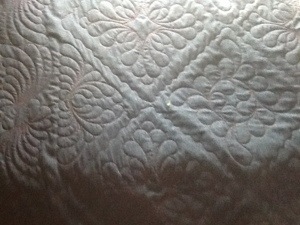
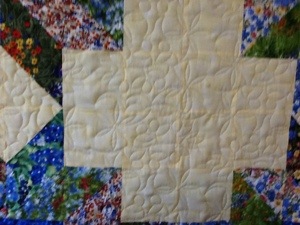
Meanwhile I am starting to work on a modern quilt, at least one that I would define as modern, lots of negative space, more solid colors than I normally use, and it is a challenge. I love jumping out of my box and exploring this movement. Here is a pic of my beginnings… This is just a grouping of various blocks that were a study in space and shape. I intend to slice and dice them into more shapes and set them in a sea of plain white then play with textural quilting. I’ll post as this project progresses. You never know I might dip dye my hair before its all over!

20130606-060041.jpg

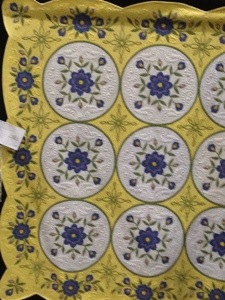
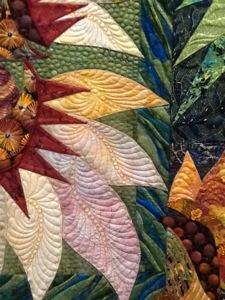
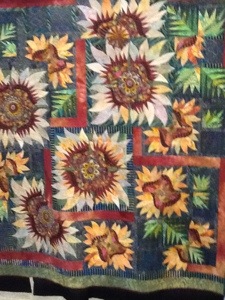
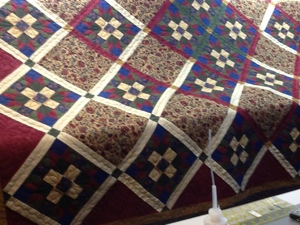
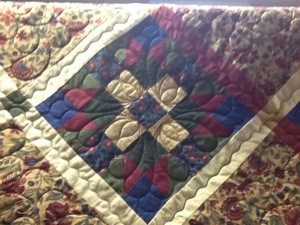
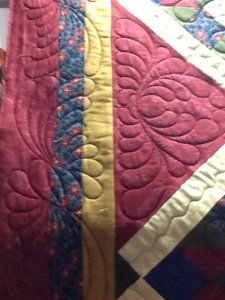
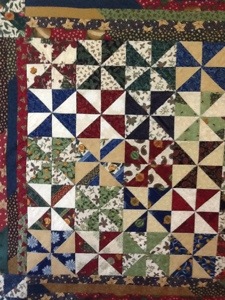
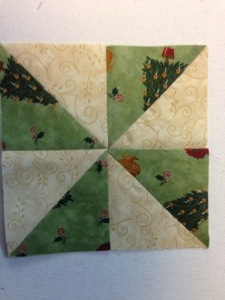
Meanwhile here’s a traditional quilt I just finished, just fun! Good job Keeley!

Have fun and Bee Happy! Karen

20130606-060818.jpg

20130606-060828.jpg

20130606-060836.jpg

Advertisement

How Many Quilters Does It Take

Standard

…to change a light bulb? Well, have you ever put such mundane things off (like changing a light bulb) just because you don’t want to stop your sewing/quilting project? The answer is only ONE, I just had to stop long enough to do it, after all the bulb(s) were in the potty room and the hall to the utility room, NOT MY Sewing room! Who needs light in those rooms? Anyway, light has come back into the Shively house!

Meanwhile back at sewing I have been quilting away, making memory pillows for some middle schoolers, and making my way through an Art For Quilters online class. So much fun and so little time!

Thought you might like to see the memory pillow project. Quick, easy, and another option for a favorite t-shirt. I used my trusty serger and an embroidery machine, but, of course, you could use a DSM and even hand embroider. First cut through the t shirt straight up the side seams. In this case I used a 12 inch square ruler and fussy cut the artwork. Mine was too big so I had a great natural spot to cut another piece as large as possible, using the natural hem of the shirt. Then I used the back piece to cut another square about two inches shorter. These pieces will overlap and provide the back of the pillow pocket. Just sew around all four sides and you have a cute memory pillow. Hope these pics give you a better idea. First pic is finished pillow, second shows the front of the T-shirt cut into two pieces, the third was the original tshirt before I cut in apart, and the last is the finished pillow. Super simple and took less than ten minutes (not counting the embroidery of course).

20130605-060221.jpg

20130605-060245.jpg

20130605-060322.jpg

20130605-060338.jpg

Back to having fun. Hope you get a chance to try the pillow. In this case I used a 14″ pillow for stuffing, no backing on the shirt, worked perfectly!

Bee happy…Karen

PSsssst! It disappears!

Standard

Well. Getting back into the groove here, finishing up a great scrap quilt that is on the table today. Thought I would share a fantastic tip I picked up from the great Sharon Schamber! If you use the blue disappearing pens to mark your sewing or quilting projects, I am sure you join me in having seen the blue run or reappear. Well, guess what, A SOLUTION! Apparently the chemicals used in the blue pen are the same used in swimming pools. If you spray the marks gently with spray starch like you buy in the grocery in a spray can, they disappear immediately. According to Sharon, the spray starch changes the Ph in the blue chemical and just makes it go away permanently with no running! How great is this?

Meanwhile, here are a couple more quilts from the MQS show.

20130522-054906.jpg

20130522-054919.jpg

20130522-054933.jpg

20130522-054940.jpg

20130522-054954.jpg

20130522-055002.jpg

20130522-055010.jpg

Enjoy and Bee Happy!
Karen

BABY QUILT HEADED HOME

Standard

Another quilt headed home today!

20130507-074932.jpg

20130507-074924.jpg What a wonderful little baby quilt. Lots of rubber duckies and quilted with duckies. Great job Holly!

Looking forward to visiting another guild meeting tonight. Tri-County guild in Cypress, Tx. Love those ladies. Tomorrow my guild, Coastal Prairie Quilt Guild of Texas welcomes Karen Kay Buckley, fresh from her BEST OF SHOW win at Paducah! How much fun will that be!

Bee Happy, Karen

Disaster Assistance Team

Standard

Well, yesterday totally required a Disaster Assistance Team…part of the days disaster was loosing my so terrific picture of friends Sandy and Judy standing next to a truck advertising Disaster Assistance Team. Sigh…

Left early morning for a trip up to Montgomery Texas to meet a quilting buddy and her hubby, Sandy and Gerald. Going to visit and bring home a wonderful batting rack that Sandy was kindly donating my way. Almost made it when my baby, my cream white SUV decided it wouldn’t go further. Beautiful weather, sunny with a nice breeze, and there we sat! Onstar was great, that is after nearly an hour of convincing the obviously new employee that I was indeed 12 miles from I45 and did not need to be towed to Austin, 3 hours away. What can I say, she was obviously very new and trying hard. Eventually the tow truck came and off went my baby. It now sits at Buckelew Chevy in Conroe Tx. The good thing about that was that the serviceman, CW, lives on my end of town and gave us a ride back to a stafford, Tx. Looking on the bright side! Had a great time visiting with Sandy and Gerald!

Ok, back to quilting. Here is the result of my pin wheel experiment from a few days ago. I will use it as a table topper when I get it quilted. I do like it though. The method worked really well, although it needed to be heavily starched to avoid mis shapen blocks due to the bias’.

20130505-153609.jpg

20130505-153617.jpg

Also finished a wonderful Texas bluebonnet quilt which will wing its way to its new home next week. Can you see the wonderful quilted bluebonnet a? I love them

20130505-153809.jpg

20130505-153816.jpg

Off to see a lady about her tshirt quilt.

Bee happy, Karen

Pinwheel perfect!

Standard

Well I’ve been playing with using up my stash and found some wonderful charm squares. Somewhere I saw a quilter making half square triangles from these. I wish I could remember where so I could give her credit. Here is how I remember it though.

20130501-053912.jpg

Take 2 charms and place them right sides together. Sew a scant 1/4 inch seam all around all four sides of the charms

20130501-054210.jpg

20130501-054233.jpg

20130501-054246.jpg

20130501-054259.jpg

20130501-054306.jpg

Carefully use your rotary cutter and ruler to cut these from corner to corner across the charms diagonally. Press each HST open, pressing the seams to the dark side. I advise using starch to stabilize the bias edges.

20130501-054733.jpg

20130501-054753.jpg

20130501-054804.jpg

20130501-054854.jpg
Once you have your pieces ironed, place them so that you can sew two HST together to form half of your pinwheel. Sew both halves. These will each nest easily. Now you will sew both halves together to form the final pinwheel. This is the tricky part. I pin them because of the thickness of the intersection. Note the pins in my pictures. I first pin one pin vertically thru the layers at where the center seams meet. You can peak between the layers to see that these seams match. THEN, I put a pin into the project on both sides of center, very close to the first pin. You can then remove the center pin and sew your seam. Only one center pin allows the fabric to “roll” and can offset your perfectly matched seam.

20130501-055748.jpg

20130501-055805.jpg

Once you have your perfectly matched seam you are ready to press your pinwheel. Make sure your seams are all pressed the same direction as they spin around your pinwheel. Then, by gently manipulating the center (you may have to loosen one or two stitches) you can make a beautiful tiny pinwheel in the center back of your block. Press this and you will have a perfect pinwheel!

20130501-060257.jpg

Congratulations. Sew easy!
Bee Happy, Karen

Hand Sewing Hexies????

Standard

Well, everyone who knows me is very aware of my “love” for hand sewing…NOT!  I think it is just a lack of patience for me.  I really have a very hard time even binding my quilts and putting a sleeve on.  Yes, I do know how but just seem to have a hard time sitting still long enough to do hand work, even when I’m forced to sit still in a doctor’s office or where ever…Oh well, I have accepted it.

I have a box of hexies sitting next to my chair in front of the TV, even have a few done, but it just sits there looking at me.  AH HA…just found hexies that are more my speed.

Check out  http://www.ladyharvatine.com/2010/03/hexagonia.html for a tutorial on Hexies by Machine!  I may even try these just for kicks.

Off to quilt guild for a lecture by Mickie Mowery on Tiny Pieces…hmmm, we shall see!  I hear her quilts are fantastic and will take some pics to share for those whose mental capacity allows them to sew teeny-tiny pieces.

Meanwhile, BE HAPPY!  Karen